


Were Baaaaack!!!!
More Project Design
featuring chairs
In case you missed it read
part one here

First off....this upholstery thing that some people do for a living is much harder
than it looks
And it requires an odd assortment of tools, like webbing stretchers and tack pullers which
on face value seem silly but are invaluable when you get into the nitty-gritty
of chair re-working.
I have the blisters to prove it!

This project took much longer than I thought it would and much of the extra time was spent getting the chair into a condition where someone could actually sit in it.
Something to consider if your buying a chair that will be deconstructed.
I think the only thing holding this chair together was the upholstery fabric.

I spent hours, pulling out staples and tacks.
What a job.

Here you get a bit of an idea as to how much junk was nailed onto the chair frame

There were also areas that were compromised because of the age of this chair which I suspect is
mid 1850's based on the square nails, the hand turned legs and the hardware.

Every thing needed extra bracing and re-gluing, which is pretty easy to do
but is really time consuming


Interestingly the springs were in really good shape.
I sanded all of the exposed wood and scrubbed the entire chair with
mild soap and water.
A favorite detail on this chair is the old steel bracing which goes around the entire base of the chair.
The little feet are pretty cute too.

Finally the wood was reconditioned using Watco Danish oil which is a combination
of penetrating oil and varnish.
It really doesn't look like vanish and dries with just a slight sheen.
The areas that had old existing varnish brightened up
and the newly sanded wood took on a sightly darker rustic finish.

The only actually upholstery left when I was done prepping
was the webbing along the interior back and this
interesting padding along the front filled with horse hair.

Initially I wanted to use burlap and unbleached muslin for this project.
I also purchased some simple pale mattress ticking fabric
Here are some chairs for inspiration:


I think it was important to keep the chair back open so you could actually see the "bones" and structure of the old wood and webbing

The seat was redone with a new burlap covering over the springs

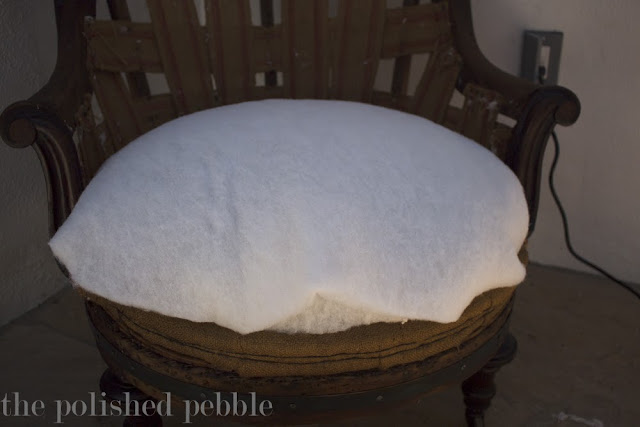
I wanted a tall cushy seat so I started with good quality natural cotton filler, topped with smooth
Dacron. All of the materials I special ordered not really knowing exactly how much I needed or if I was getting the right stuff.
But it all worked out pretty well actually
After messing around with all of the fabric options,
I finally chose.....

This bright blue Indian Kantha quilt for the covering.
Here are a few of the details:

The front edge was quilted using upholstery thread

I left the top cushion more "pillow" like and added extra batting to the edges.
Little details like quilting stitches and threads are exposed.


So here is what happened after the seat was done....I couldn't get the back fabric the way I wanted it.
I tried burlap and muslin and nothing looked right.
So for now I just left it.
The back will require some sewing to get it right and I will share the finished chair in a few weeks when I have it completed


Some final thoughts:
I know enough about upholstery work to maybe take on something similar...then again: )
I also have a great appreciation all those projects I had my upholstery team work on and seriously doubt I could ever have gotten them to remove all of those staples and tacks!
Don't forget to check out the other awesome chair projects
And have a great weekend
Can you believe summer is almost over?
SaveSave
Kelley,
ReplyDeleteI love this chair. I'm not sure I'd have tackled it myself, but clearly it was worthwhile. The fabric is perfect with the deconstructed details. Great job.
xo,
Karen
You never cease to amaze me. First of all I cannot believe you tackled this. I can hear my upholstery guys words when I take him an old chair like that (too many nails and staples!!) What a great idea to use the blue kantha, it really makes the old girl sing! I love everything about this chair...wouldn't you love to know where all she has been?
ReplyDeleteThank you Cindy! I suspect she has seen a lot in her day. I always think that when I pass by really old buildings too. If walls could take right? xo kelley
DeleteWow...you are amazing...it does really make you appreciate the upholstery profession. I love the cushion and pillow... nice fresh take and I'd like to sit there and have a cool drink. Bravo, Kelley.
ReplyDeleteThanks for participating.
Thank you for promoting Parisienne Farmgirl on your sidebar! I do really appreciate it!
ReplyDeleteThis chair is stunning as-is but I can't wait to see the finished project! I love that you took the time to tackle this huge project.
ReplyDeleteLove that deconstructed feel yet with the blue fabric it looks fresh!
ReplyDeleteLove it--very distinctive and standing ovation to you for taking that on because I'm pretty sure I would have thrown my upholstery tool across the room a couple of times and quit. :)
ReplyDeleteBeautiful! I play with upholstery work from time to time; cracked knuckles, and I think I remove as many staples as I install - yours is lovely.
ReplyDeleteJust love it! Can I ask you the source for the 'burlap' that you covered the seat with? It is a nice tight weave and I would love to use it for two chairs I am currently working on. Stacey
ReplyDeleteIt actually looks great just like that! I've struggled through redoing an old chair before too and I know it can be such a challenging project! Nice work on yours
ReplyDeleteIt actually looks great just like that! I've struggled through redoing an old chair before too and I know it can be such a challenging project! Nice work on yours
ReplyDeleteI love this chair. I'm not sure I'd have tackled it myself, but clearly it was worthwhile. The fabric is perfect with the deconstructed details. Great job.
ReplyDeleteเย็ดสาว
Looks wonderful! you have very big talent! I'm just finishing the bathroom and kitchen renovation with home expert ( info ). I have a few old chairs that I could change. Maybe I will try, although I know that I will never get such an effect as you ...
ReplyDeletebuy online product on treasurebox you can also buy furniture item for your lawn.
ReplyDelete